Right, so first thing you (should) do before attacking a poor, innocent model horse is come up with a plan. Your plan could be anything from a drawing or sketch you've done to a photo you love. Should the photo not be one you took yourself, be sure to get permission from the photgrapher before you go any further than planning. The last thing you want is an unhappy artist coming after you. I stumbled upon this photo on deviantART and knew I had to sculpt it.
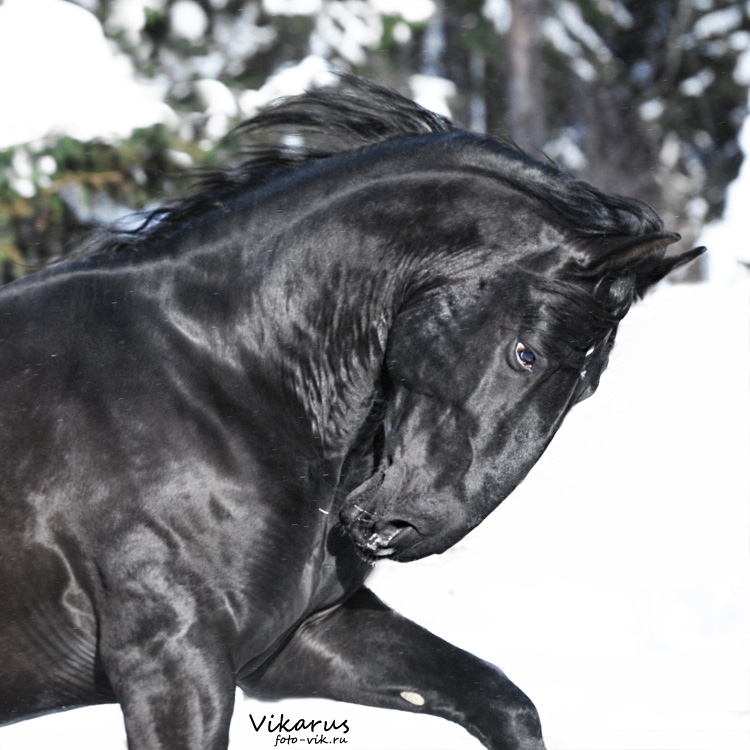 |
| Beautiful Kladruber Stallion <3 |
After obtaining permission from the artist, it's time to cut! First I removed the mane and tail since they are going to be resculpted. Flash's tail is thin enough that I just snapped it off, but the mane needed to be removed with a dremel.
 |
| Baldy! |
Sometimes I'll actually cut and reattach a limb, neck, etc. but usually I'm uber lazy and just heat the daylight out of whatever I want to move. Yes, Flash has a totally broken neck at this point. The point of the crest is too far back. This is not a point you want to stop and start adding epoxy!
 |
| Ouch! |
Next I had to get rid of that lump on the back of his neck and once again being lazy, I heated up the neck, took a pocket knife and cut it off.

Really badly. Lol. If you decide that the heat and cut method is good for you, be sure to cut away from yourself.
This is where I forgot that I was documenting this piece and just started going nuts. It's also not that easy to take photos with epoxy on your hands. Anywho, using my top photo as referance I first built up my topline and the underside of the neck. Then I went on to rough in the muscles and detail the skin wrinkles a little while the epoxy stiffer (about 45 minutes after mixing).
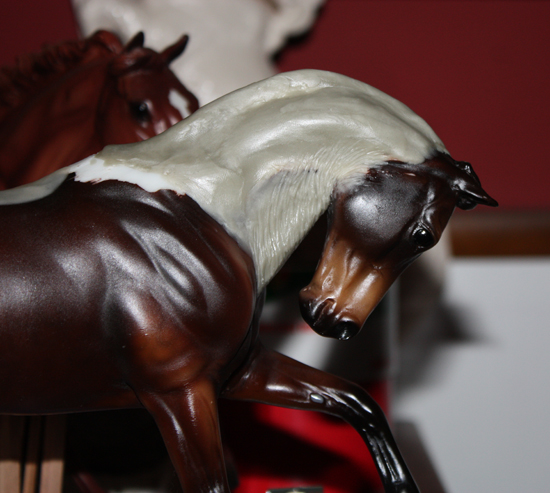

He still need more work on the neck and will be losing his face next. XD Part 2 should be up within the week.
5 comments:
How do you do the neck wrinkling? Been having issues with that so would be nice to hear what tools to use, etc...
I second Markhamc. Thanks for the walkthrough- he looks great.
Great idea about the Walkthrough, I love seeing how other people work their way over a remake horse, I always learn a lot from just watching. Please more of it. :D
Your reference horse looks awesome and I can't wait seeing the Flash be turned into awesomeness as well.
markhamc and shoestringstable - I'll do a post on wrinkles shortly. Thanks for the idea ladies!
Ailanreanter - If this walkthrough series goes over well, I have at least another two fairly drastic ones in my head that I would love to do too. Walkthroughts that is. The models will be chopped up regardless. XD It's such a good thing that these are plastic horses with no feelings, I think most of them would resent me. Thanks for stopping by!
I'd be very delighted to see more. :D
The more drastic the better, I like taking them apart as well, just don't have enough time for those projects currently and stick to easier ones.
Ooh very true, I am pretty sure each Breyer prays when leaving the factory "Please let my new owner not be a remaker"... XD
Post a Comment